

Today I have to share a dilemma that many online bloggers go through. Actually, virtually anyone can experience this problem. It's called losing your pictures. There are many ways to go through this - losing your camera, some sort of bug in your camera, or in my case, having your crappy laptop wipe out all the pics on your SD card. Yup, I just went through that today. My laptop erased a couple hundred of my photos on my SD card, including two new blogposts and pics from my recent trips to CA and IL. I'm sure I entered major depression today at least a couple times.

The reason why I'm sharing this is because many of the pictures I lost were of the beautiful cake I'm sharing with you today. This cake, a pink ombre rose cake, looks extremely beautiful and professional, but in all honesty, it's really very easy for anyone to make. So, I had many pictures to demonstrate but I lost them all and these few I had saved before my laptop went on a random killing spree.
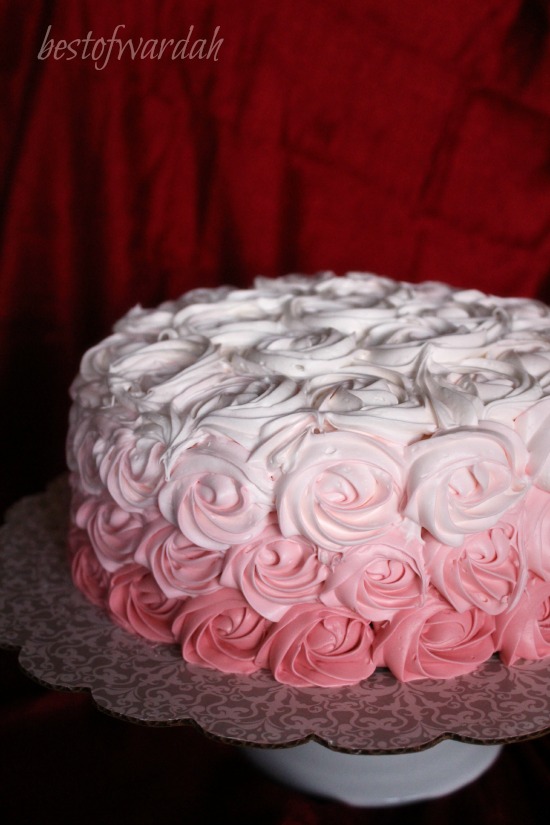
Lucky for you, I can explain pretty well with words as well. Here goes...
Pink Ombre Rose Cake
You will need-
a prepped cake
around 4 cups of medium stiff buttercream icing (or 4 tubs of standard store brought frosting)
a Wilton 1M icing tip
a piping bag
pink (or any color) dye
A prepped cake is a cake that has been baked, cooled, torted or cut into layers, filled, and finished with a crumb coat. A crumb coat is a very thin, not particularly neat coat of icing on your cooled cake which catches all the crumbs from the cake and traps them in the layer of icing. This is particularly important on cakes that are much darker than your frosting color. I made a 8" chocolate cake with four layers, filled with cream cheese frosting, and crumb coated with a white frosting. Cool the cake for 15-30 min at least after this stage.
Meanwhile, you can prepare your frosting. I dyed around one cup of frosting a dark pink to start off with. Drop the tip into a piping bag and snip off the end. Practice piping the rose before working on the cake. To pipe the rose, hold your piping bag at a 90 degree angle from your surface. Start by putting a little pressure on your bag and without releasing the pressure, pipe in a swirl shape starting in the center. Finish off the swirl by tucking the end on the side of the "rose" and release pressure.
Start icing the bottom row of your cake, making sure to leave enough room for two more rows. The rest is simple. Finish the row of roses and lighten your pink icing with more white icing until you reach your desired shade. Pipe the next row of roses. Then, using white frosting, pipe your last row of frosting around the sides and move on to the top. Start by piping a row of roses along the circumference of the cake top and move into the center. When you're done, you'll have one beautiful rose covered cake! And let me tell you, your family and/or guests will be stunned.
Also, feel free to Google this technique and/or watch videos on how to pipe a buttercream rose if you want to see a physical demonstration. Ask me any questions you may have as well.
Good luck and let me know how your cakes turn out!


love the color shade and the rose look. Have you tried Pakistani Cooking Recipes I love all Pakistani Recipes and mostly the appetizers by zarnak sidhwa recipes
Post a Comment